documentation
Want to Learn More?
Introduction
Our
Your area is private and your lists, campaigns and personal templates are not shared whatsoever.
Below is a summary of the main features of the Mailer Application and this document will show you how to use these features.
Lists – You can create/import any type of list – personal contacts, outside sales associates, clients and any other type you have or need.
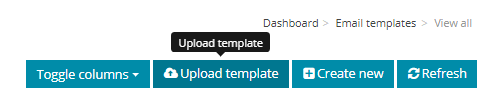
Templates – You can create, design, modify, store and re-use any template you want. Further, you may find a template you like on the web, save it to your system and upload to your ‘My Templates’ area.
Campaigns – You can create unlimited campaigns to your lists, sending manually or you can set up auto-responses to your subscribers/contacts.
Tracking/Follow-up – One of the most important aspects of any online system is a tracking method to engage in client follow-up. The Mail Application gives you detailed tracking logs so you may engage those clients who have shown interest merely by their click activity.
You will be able to check who opened your email and which link they clicked and when etc.
Important – to create your first campaign, your profile/account, lists, and templates must be set up and created first!
Required order before creating your first campaign:
1. Set Account requirements.
2. Create at least one List.
3. Create or import at least one Template.
4. Create your first Campaign.
1. Dashboard

1.1 Title Bar
The Title Bar at the top of the Dashboard is for quick links and your account settings.
![]()
1. Customer Area icon is simply a ‘home’ link, available on any page to take you back to the Dashboard.
2. Collapse icon ‘hides’ the left menu to give you more workspace in the main body.
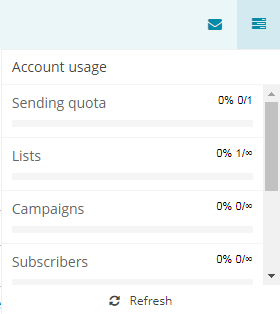
3. Account Usage icon gives you a quick summary of your Lists, Campaigns and
Subscribers.
a. Sending quota
b. Lists
c. Campaigns
d. Subscribers
4. Your name in the upper right has two links, one to your ‘My Account’ settings and the other ‘Logout.’
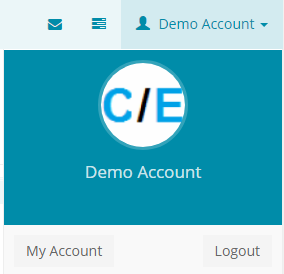
a. Logout – It is important that if you are using an office computer or a public computer that you log out of your account or your account profile – email, password and other private information such as all customer information would be at risk.
b. My Account – Has two tabs, each one is very important information that is used for your templates and the Campaigns you create. Without some of this information, you will not be able to finish building a campaign, which goes without saying, you will not be able to send a campaign.
Profile tab – Includes First name, Last name, Email, Password, Timezone, Language and a Browse button so that you can upload an image of yourself. You must use your email address and assigned password that matches your email password.

Company tab – Includes company name. Company information is those items that will be auto-filled in your templates if you use ‘tags’. (More on that later in this manual.)
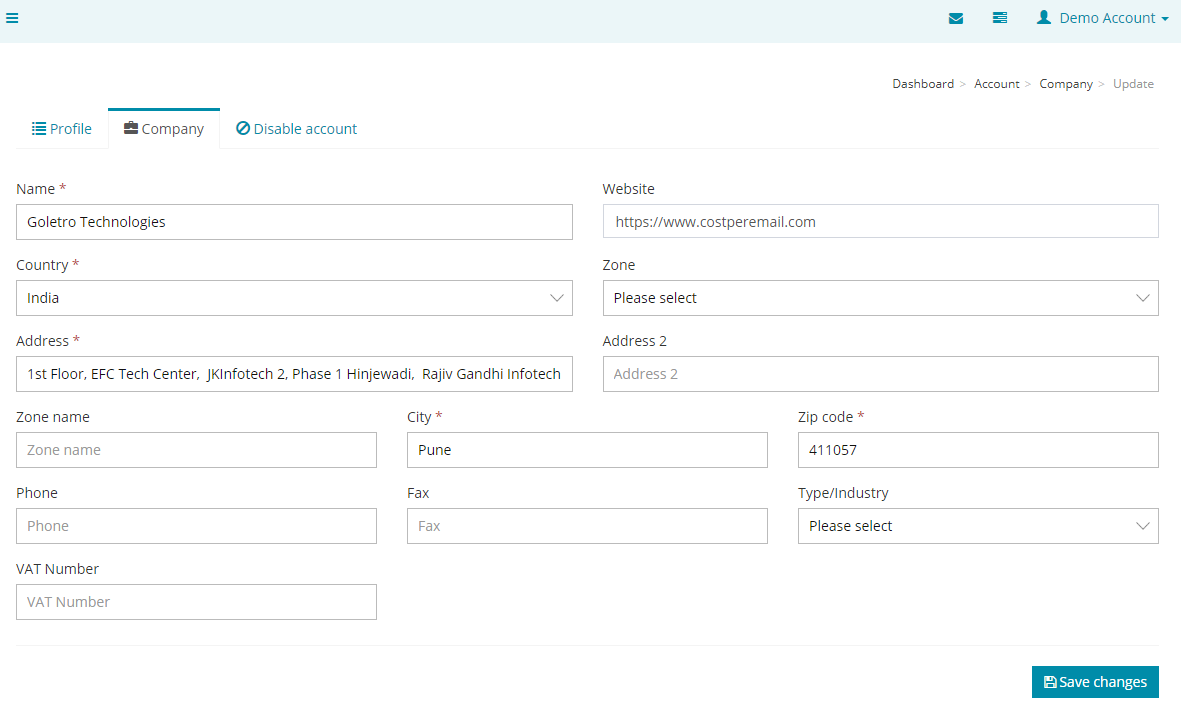
Company address items that are required are designated with a *. For company phone, it could be your direct contact number, whether it is a cell phone or landline if you are an independent contractor (such as a real estate agent). As will be explained, the information in the templates can be changed by you.
1.2 Summary Areas
a. Campaigns
b. Lists
c. Subscribers
d. Templates

For example, if you have sent out 20 campaigns, you will be able to use the headers to search a campaign, click on that campaign to view and if it has not been sent, to modify it.
The remaining summary areas allow you to quickly view all current activity with respect to what you recently did, Subscriber, List, Campaign and Unsubscribe growth as your activities with each expands.
2. Lists


2.1 Lists
At this stage, you are only concerned about creating the list name and the list criteria, not adding or importing names.
The create window requires you to input pertinent data such as General Data, Defaults, Notification settings and Company information needed for any campaign.
General Data – Name of the list and your display name of the list if you want it different. A summary description of your list. Contact defaults would be those set in your Account Settings. If you wish to change these for a certain list, you would do so here. Opt In or Opt Out type, either single or double. For example, a double opt-in is when a subscriber signs up on your website (first opt-in) and then receives an email to confirm the registration. A single opt-in or opt-out is when someone clicks to register (or unregister) and is immediately opted in or out without receiving an email that must be confirmed.
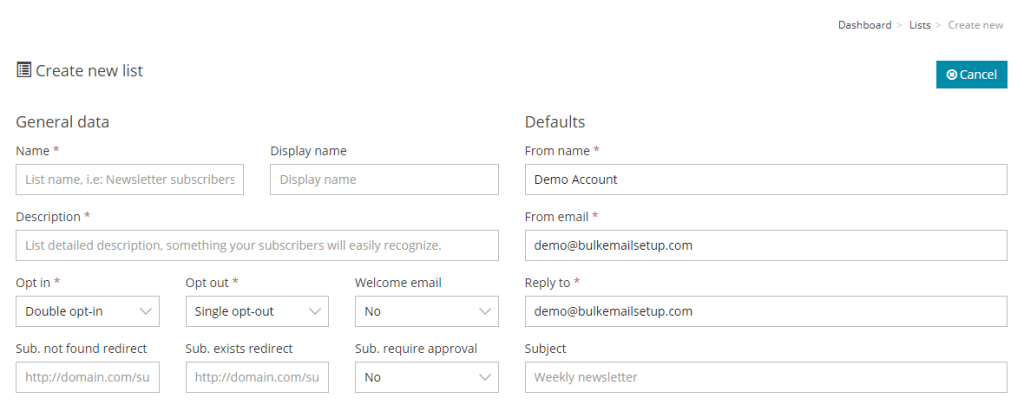
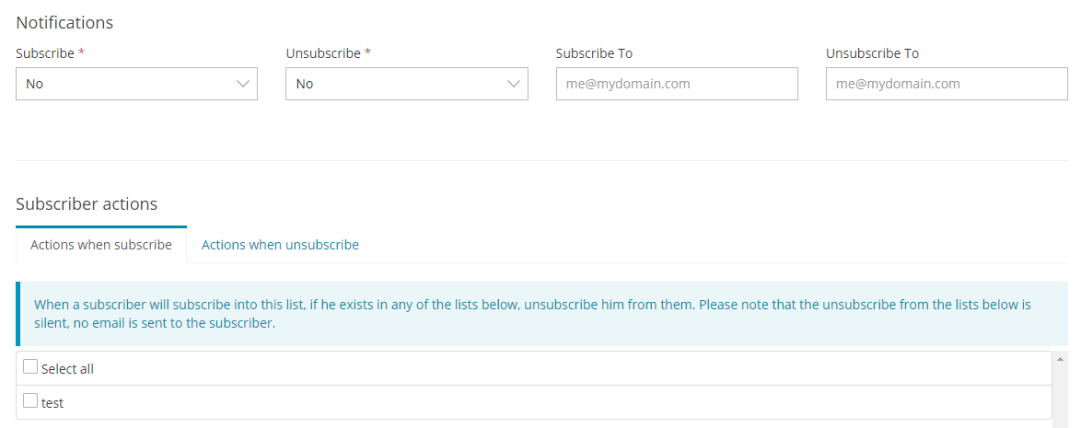
Notifications – Whether you wish to receive email notifications of each opt-in or opt-out. Keep in mind that you can log in your Dashboard to see the opt-ins and opt-outs.
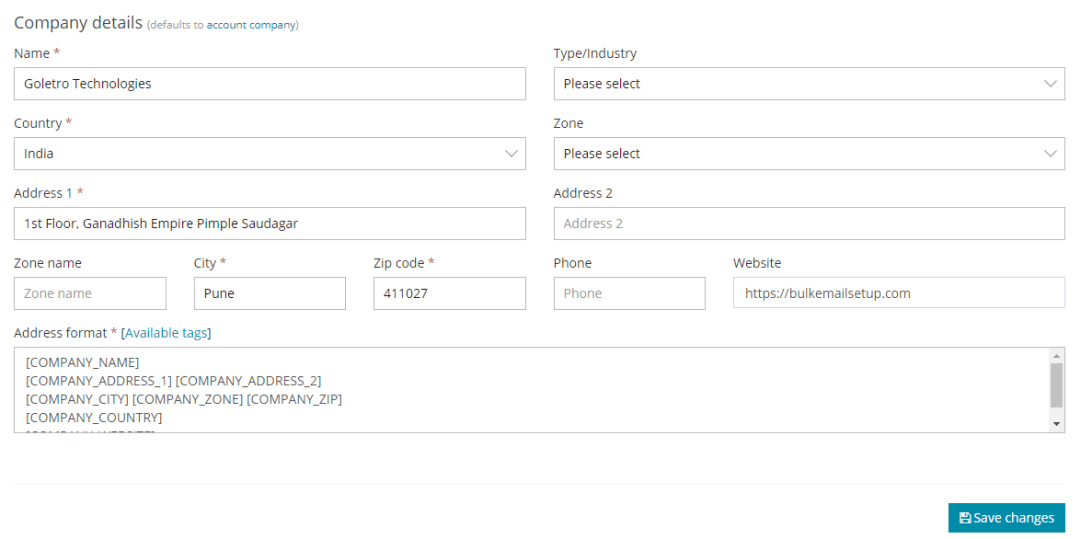
Company Details – Defaults would be those in your Account Settings. As in the Contact information in the General Data above, the Company Details default to your Company Account Settings. If you wish to change these for a certain list, you would do so here.
Once you have created your list, it will appear in the list window, with the name of the list, display name if you gave it one, and there will be 4 icon links to the right of the list.
The 4 icons on the right are Overview, Copy, Update and Delete. Copy and Delete are self-explanatory for the list. The Update icon is to edit any criteria you originally inputted.

The Overview icon, the first one, is of most interest here as it has some powerful features over time you will make more use of. It is noteworthy here to clarify even though it is implied, the ‘Overview boxes’ and ‘Information headers’ that appear from the Overview icon are for that list only! Each list will have their own Overview, Copy, Update and Delete icons.
Once you click on the Overview icon, the List Overview will appear. You will, by applying your time, realize this area has extremely powerful features for your marketing development.
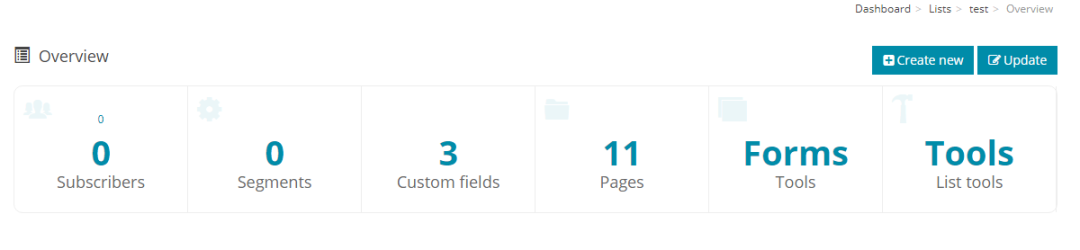
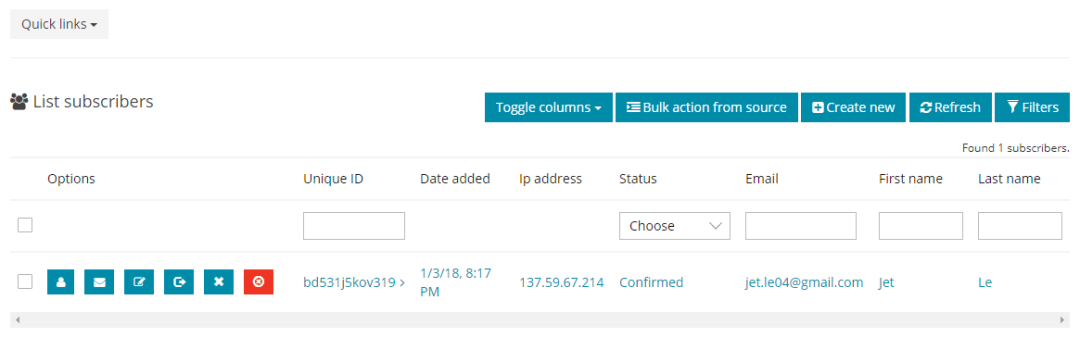
Subscriber box – you can manage your existing subscribers (create/update/remove) and also you can adjust your list depending on your subscribers. For example, you can add new custom fields or remove existing.
Segmentation box – you can segment your list with various criteria based on your custom list fields and on a high number of operators. Segmentation will help you target a specific type of users when sending campaigns.

Custom Fields box, Pages box, and Forms box – are for your website and visitor subscriber areas. You have the ability to create, customize and add these forms to your website for your site visitors to subscribe or unsubscribe.
You will not need much web building knowledge to apply these areas.
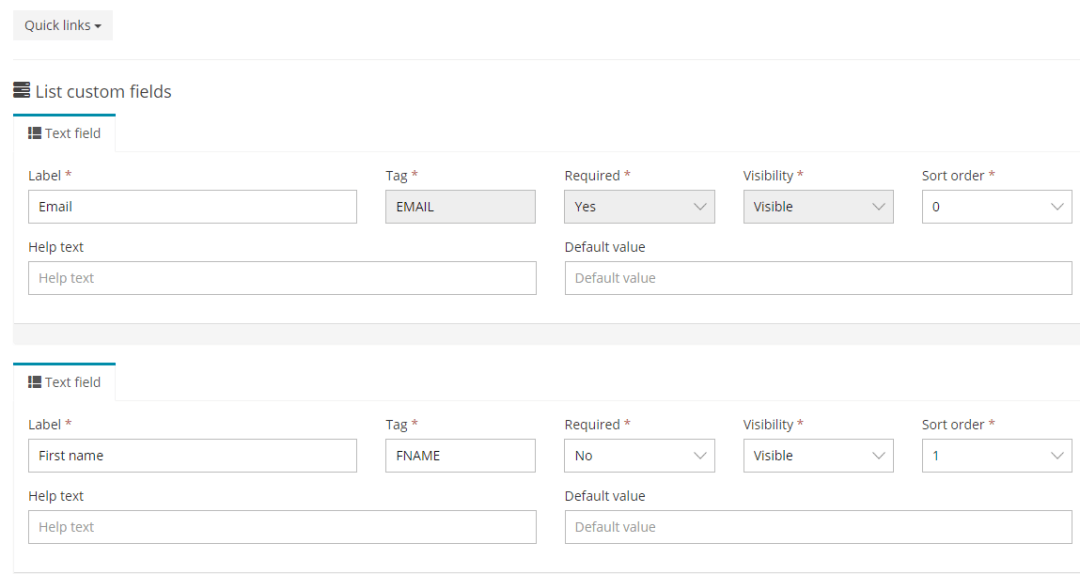
Custom Fields – You can create and customize the register/subscribe fields for your website pages where visitors can fill out and they will be added to your list. You can make multiple lists for not only contact type, i.e. Broker, Agent, etc. but for different products or services. For example, if you have clients interested in Real Estate and Yachts, you can have them subscribe or unsubscribe to one, the other, or both!
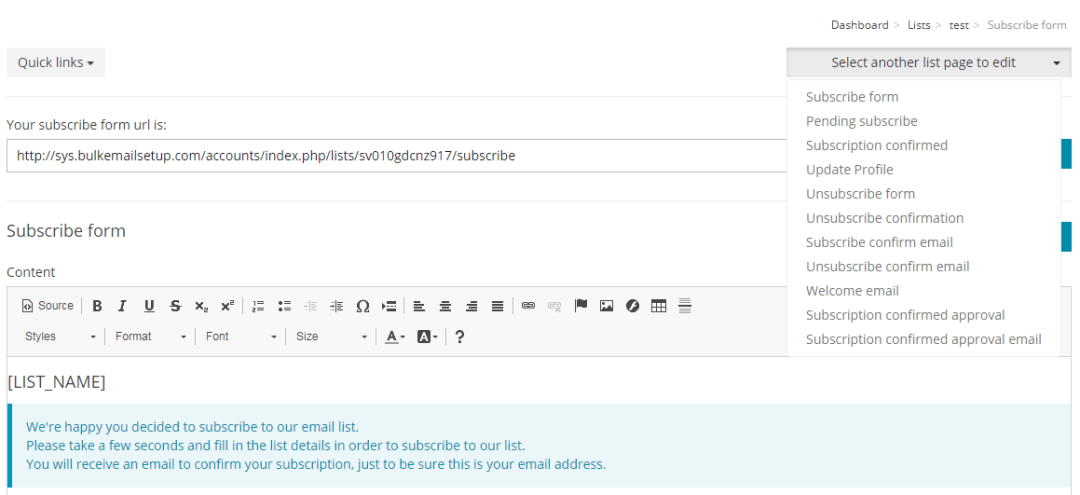
Pages – You can preview the first page of the 8 pre-built pages you can use.
The pre-built pages are:
- Subscribe form
- Pending subscribe
- Subscription confirmed
- Update profile
- Unsubscribe form
- Unsubscribe confirmation
- Subscribe confirm email
- Unsubscribe confirm email
Forms – You can customize your subscribe and unsubscribe forms of any particular list.

Tools box – is used to import, export and copy your list/subscribers. CSV and Text files will be most applicable to you, while the database box is for more advanced users that do have their own MYSQL databases.
Clicking on the Tools box brings you to the options to Import, Export or Copy a list:
Import – Clicking on the Import box brings up a window to choose a list you have in CSV file format. NOTE: Excel documents may be saved in CSV format. The window includes a link a CSV file example.
Export – Clicking on the Export box brings up a window to choose the Subscriber list you wish to export.
Copy – Simply choose a list, click on export and save it to a location on your computer.
2.2 Tools

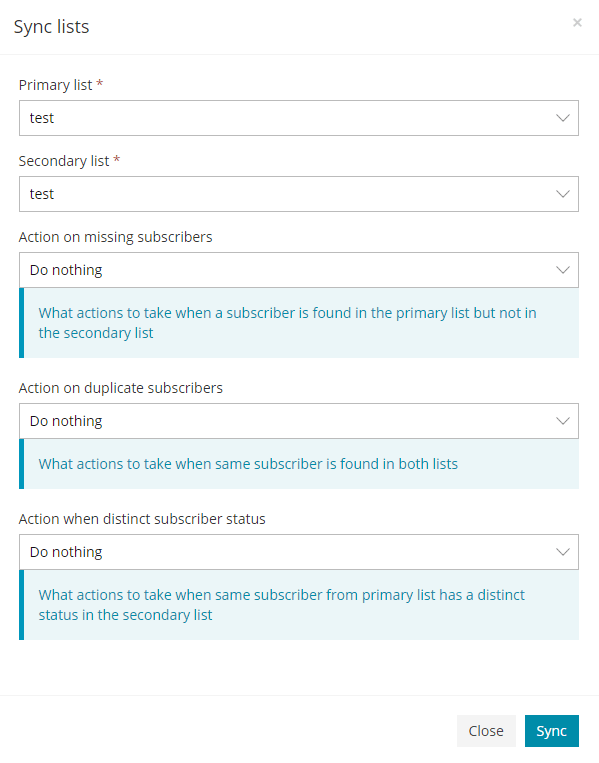
Sync Subscribers box:
Used for synchronization of your contacts/subscribes between two different lists.
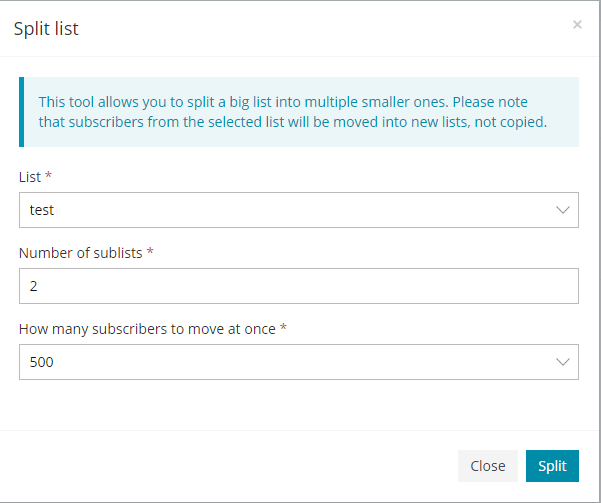
Split List box
Used for the split of your contacts/subscribes multiple smaller lists.
3. Campaigns
NOTE* – Be sure to set up your Account, and create/import at least one List and one Template before creating your first campaign.

3.1 Campaigns

Click on the ‘Create new’ button to begin creating a new campaign.
There are two required fields, you must type in a campaign name and then in the drop-down list, choose which list you want to send the campaign to.
NOTE – There are four stages of creating a campaign:
Details, Setup, Template, and Confirmation.

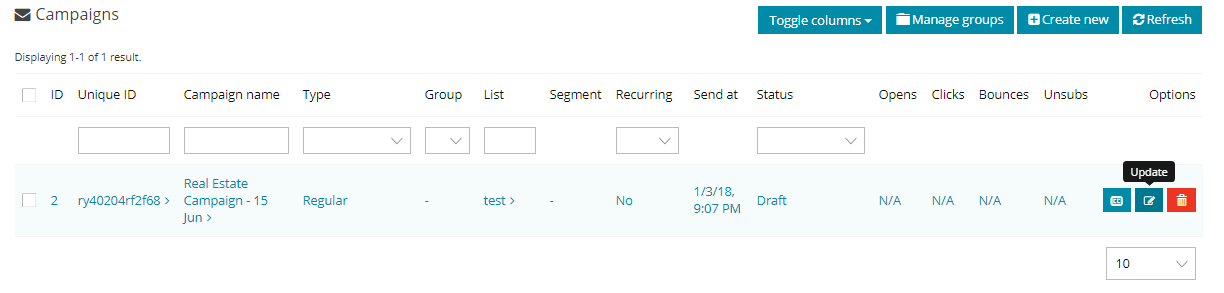
Your new campaign can be seen on the campaign list.
Click on the ‘Campaign name’ or the ‘Pencil icon’ to the right to edit/modify the campaign.
Click on the ‘Pencil icon’ to go to the ‘Setup’ page of this campaign Note the Campaign ‘Steps menu’ and the ‘Save and next’ buttons as you continue.
The Campaign set up options for tracking and receiving stats.
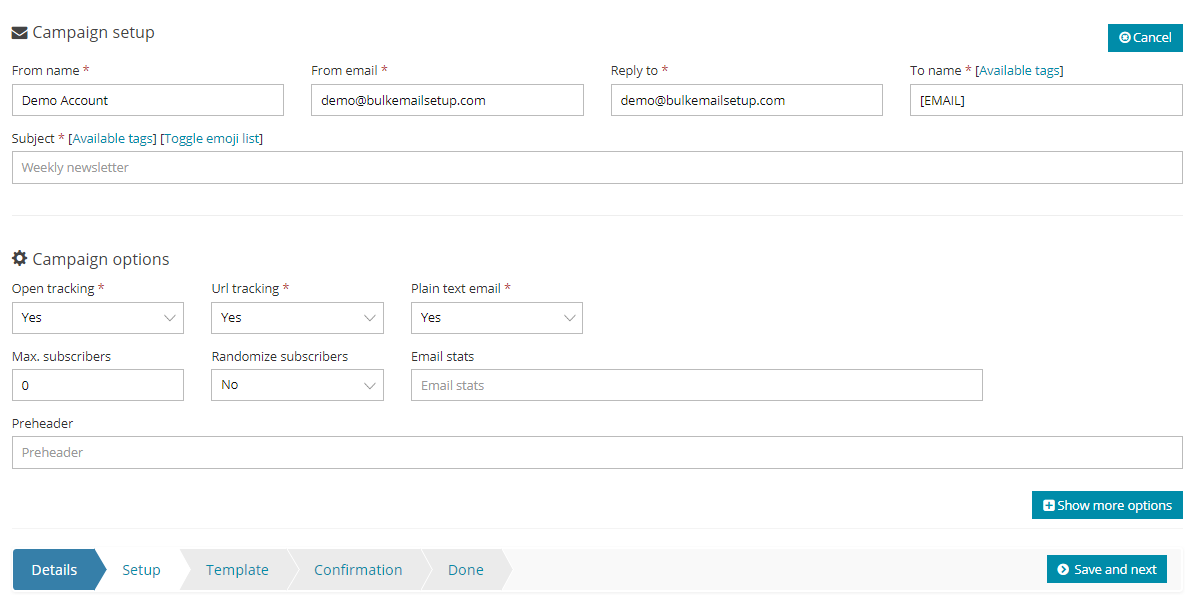
Click on each header title for information on each setting.
Clicking next will take you to the template area. Here you can create or choose a template.
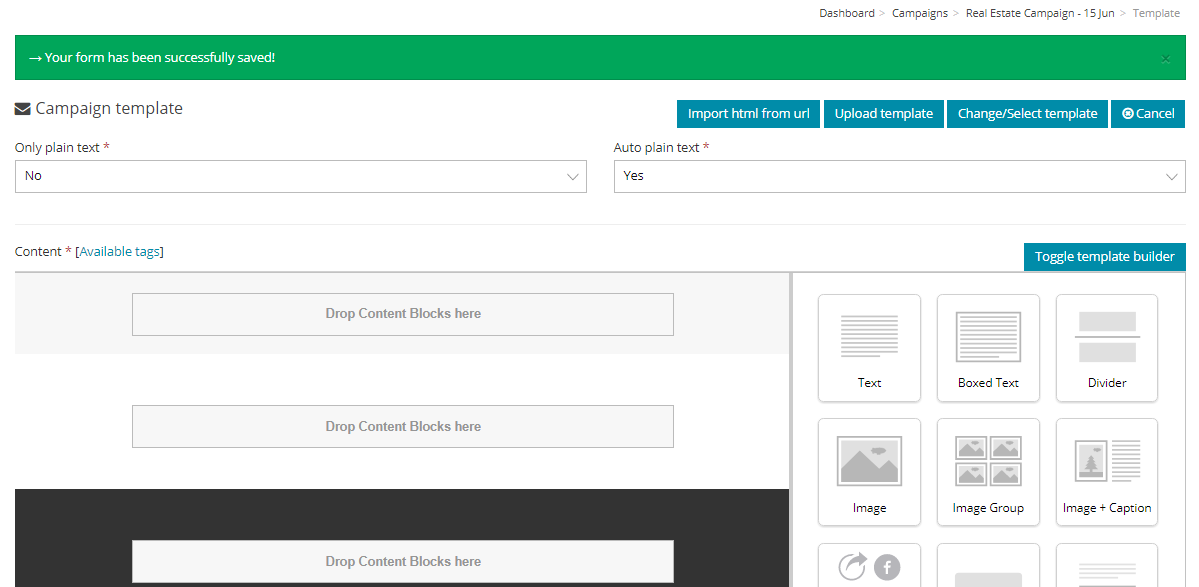
The Application uses the editor which is a WYSIWYG, a visual template builder.
You are encouraged to educate yourself on this editor in the Template area and on their website.
Without going into detail, moving your cursor over each button will give you an information box of what it does.
Also, if you are familiar with HTML coding, you may click on the ‘Source’ button to view/modify/paste code.
In this case, we will choose the ‘Change/Select Template’ button above the editor. Your ‘My email templates’ will appear that you have on your templates page.

If more than one, you will choose the template you want for this campaign.
The template you chose will appear in the template editor window.

Note: Unsubscribe Tags are required in your email template: [UNSUBSCRIBE_URL]
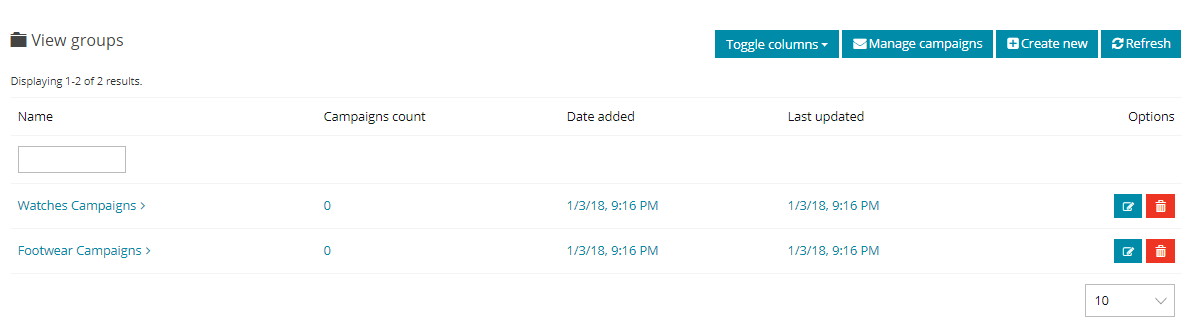
3.2 Groups
3.3 Stats
3.4 Geo Opens
For ex. if someone opens your email in the USA so you can track this information and the total number of Geo open stats will be available here.
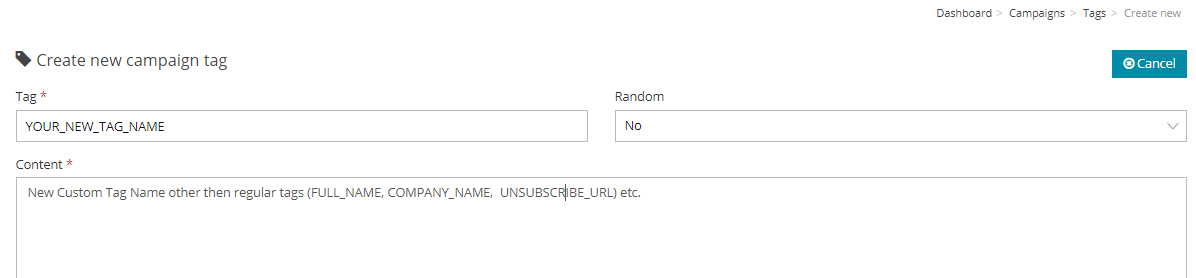
3.5 Custom Tags
Create custom tags to be used inside campaigns, in addition to the
regular tags available already for each campaign you create.
4. Email Templates

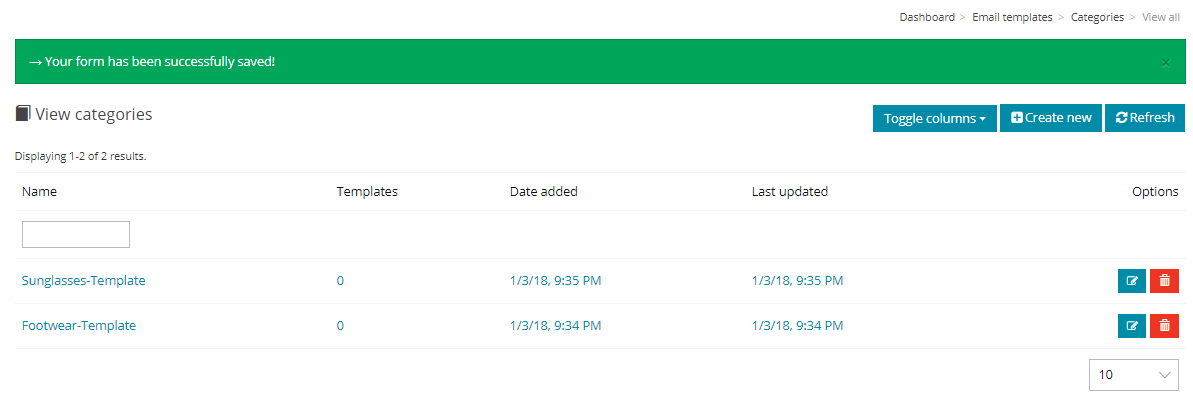
4.1 Categories
You can categorize the email templates so that it will be easier to group and find them.
4.2 Templates
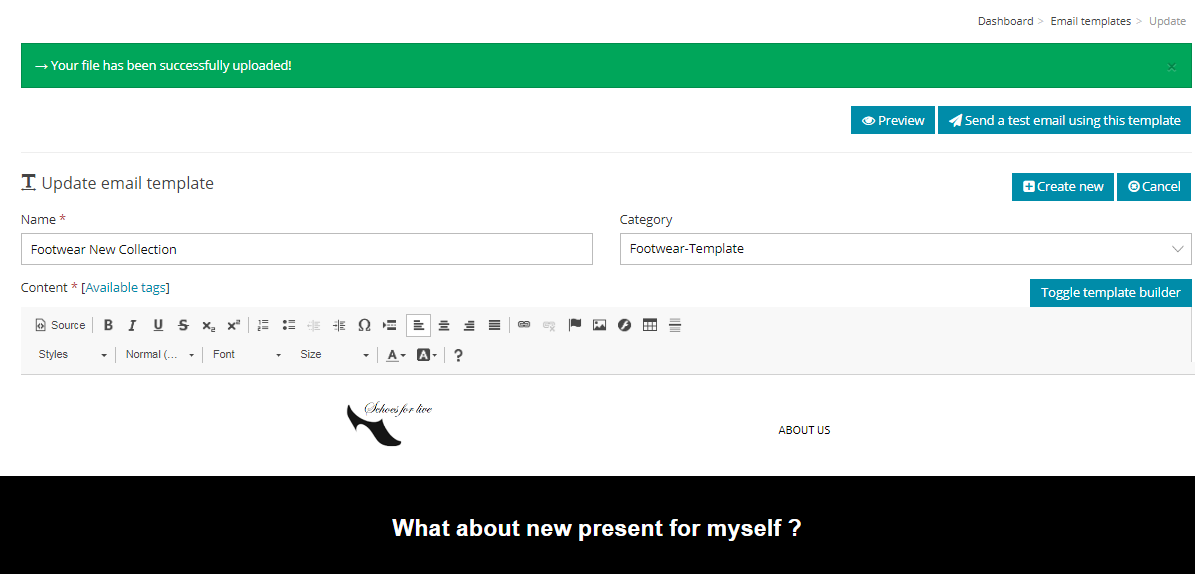
On first use, this area is blank. It will require creating or uploading a template. This does require a bit of HTML knowledge which we won’t go into here. There are a number of HTML tutorials available online.

The editor is the template-HTML editor used within the Application program and this is a What You See Is What You Get (WYSIWYG) editor as defined in the Terminology section above:
“This is used to describe a web editor interface that lets you design newsletter templates using buttons similar to those found in a word processor such as Microsoft Word. Examples of buttons include bold, italic, using headings, a button to insert images, and more.”
Most of the examples will show the ‘WYSIWYG’ display setting, not the ‘Source’ (HTML) setting.
The difference between the WYSIWYG display and the Source display.
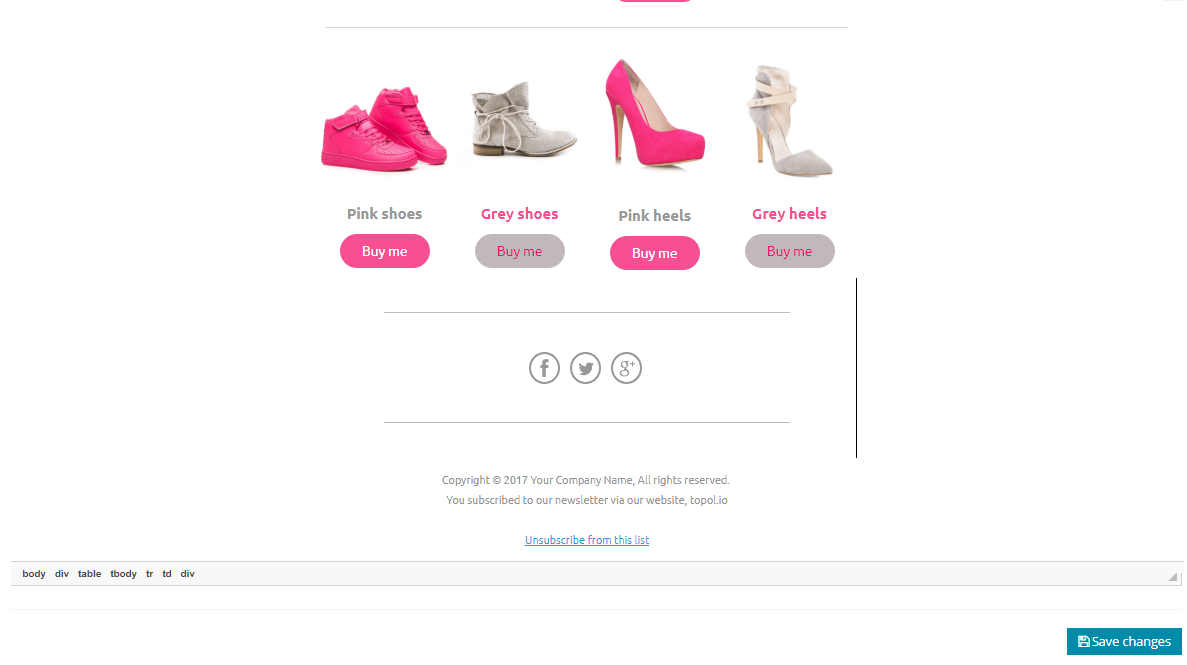
The WYSIWYG display visually shows the template as one receiving it by email or viewing it in a web browser: The Source display (by clicking on the ‘Source’ button in the upper left icon area) visually shows the template in the HTML coding behind the page.
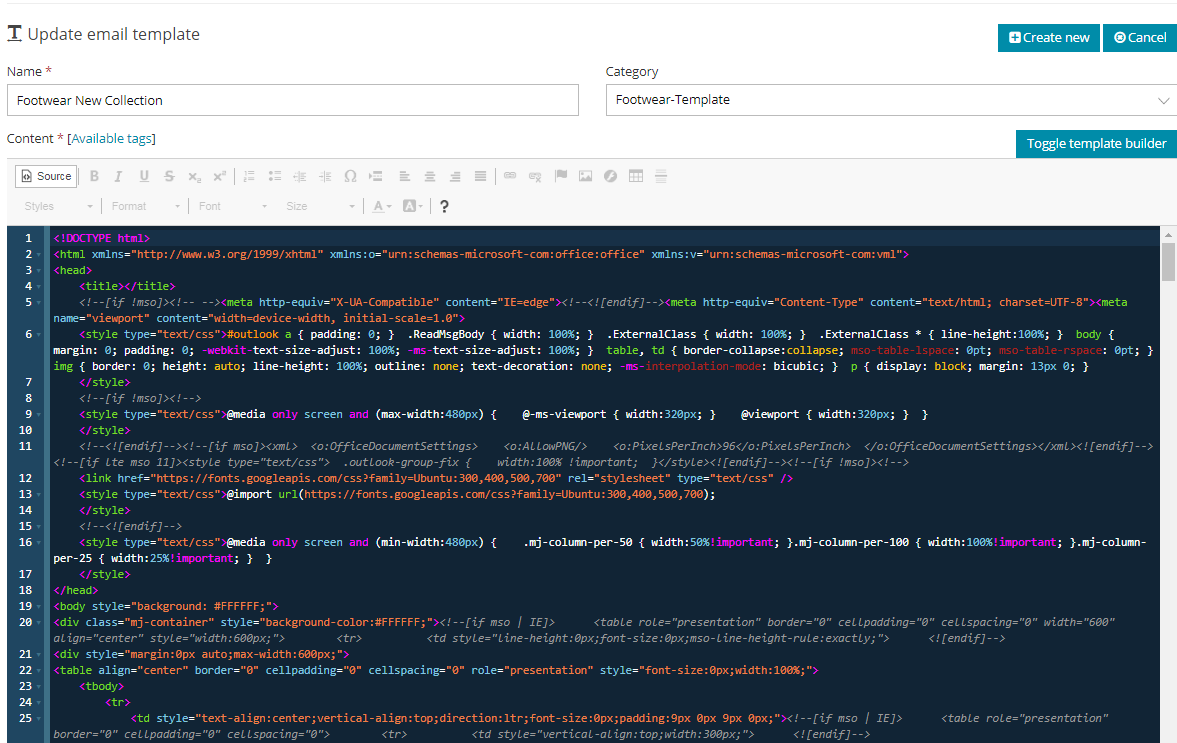
This coding normally includes tables, cells, image/website links, CSS styling and content text: For the most part, this tutorial will discuss template modifications in the WYSISWYG display setting.
NOTE – the following modifications of a template can be done in either the Templates or Campaigns area.
This addendum is two-fold, to show you how to modify templates and to show you why you would use one area or the other to make those modifications.
There are two reasons for modifying a template – First, when you import a template into ‘My Gallery’, you will want to make changes that you know will be used throughout all of your campaigns for that template. For example, a company logo that you will want displayed on every campaign.
 If you don’t make the change here, then every time you go to create a new campaign with the template, you will have to add the logo.
Second, when you create a new campaign, there will always be something you want to possibly add/delete or modify. For example, if you are a real estate agent and have a new listing, you will want to add new text content about that newly listed property and pictures.

Below explains how to modify templates in both the Templates > My templates and Campaigns > Campaigns areas. It will be in the Campaign section where modifying images will be shown.
4.3 Gallery
To import a template into ‘My Templates’, click on the menu Templates > Gallery and choose one to import by clicking on the button titled ‘Import into my templates’ below the template you choose.
The chosen template will then show in ‘My Templates.’ You may choose some of the templates or all of them.
5. Servers
Here you can add different-different email sending server, bounce server, and feedback-loop servers and assign them to the different-different customer you have created.

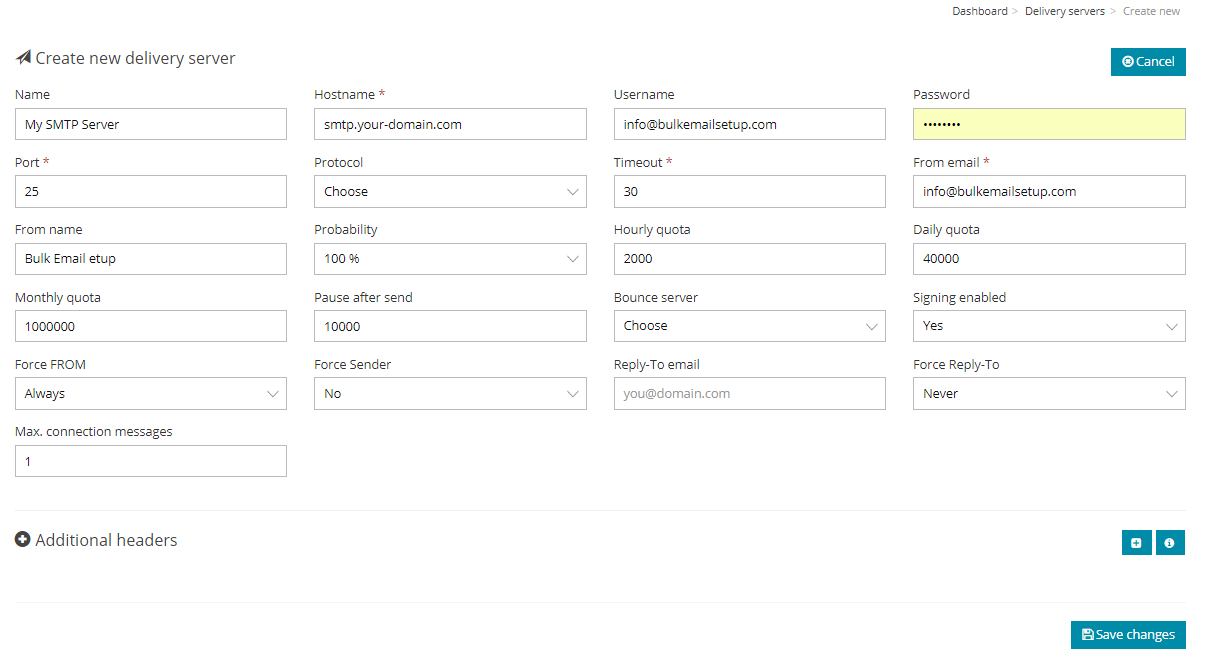
5.1 Delivery Servers
Delivery servers are responsible for delivering the emails to the subscribers.
You can add them and assign sending limit per hour and per day and interval in between each email send for the delay in between emails.
You can set the From Name and email ID from which you want to send emails to each server.
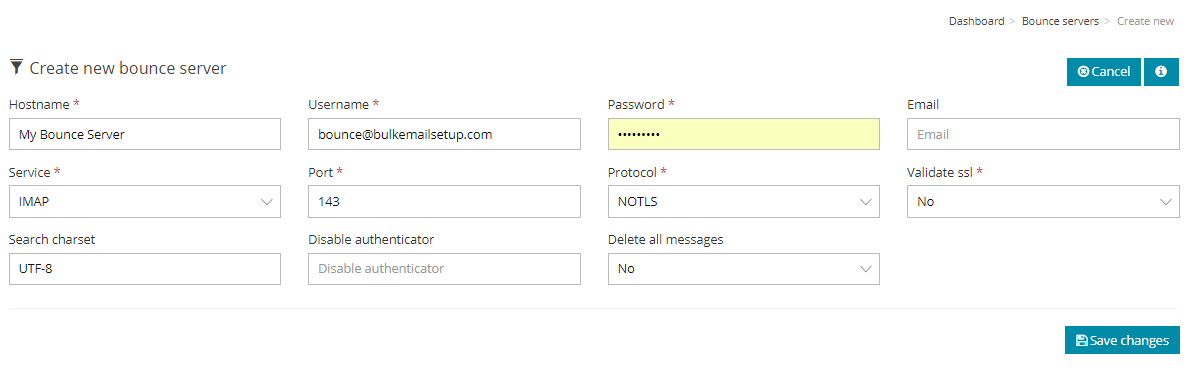
5.2 Bounce Servers
We will configure your bounce email server as well here for each SMTP server and add them to their respective email SMTP server for bounce processing.
Bounce servers are used to take action against the email addresses of the subscribers that bounce back when campaigns are sent to them.
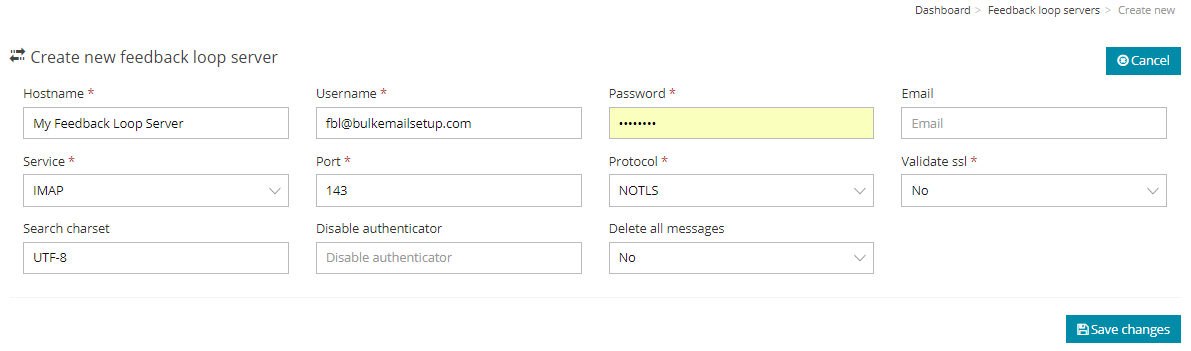
5.3 Feedback-loop Servers
Feedback loop servers will help to monitor the abuse reports/spam complaints that subscribers do and take proper action when it finds such reports.
You can get back notified once someone marked you as a spam in their email Inbox after receiving your emails.
In order to avoid this situation, you must have to follow CAN-SPAM act guidelines and also provide the unsubscribe option each time before sending emails for easy opt-out.
Let’s Get Started
Ready To Make a Real Change? Let’s Build this Thing Together!
CostperEmail
Our aim is to offer a range of best-value products and services along with cutting-edge technology and dedicated round-the-clock customer support.